r-anne-dom : a place for me (anne) to leave random blog posts.
Such as:
..knitting, sewing, and other random activities pursued
..Girl Guides of Canada : yep, Guiding Lives Here
..the 4 shops on Etsy : one features quality handmade items; the second has lots of patterns, & crafting supplies; the third is stocked with Vintage; and the fourth is guiding flowers.
Enjoy the r-anne-domness!

July 17, 2015

Sparta: Steed & Company Lavender

Sparta: Steed & Company Lavender


Known by many simply as "the lavender farm".  :)

I enjoyed my first visit so much, I came back for a second visit.


The smell of lavender is so calming!


And I bought honey!  
Mmmm... with lavender.  
From hives right here on the farm! 


(Click any photo to visit the lavender farm website.)

July 16, 2015

Sparta: Anything Used

Sparta: Anything Used
Home of Sparta Country Candles

Lots of garden and outdoor decor ideas!


And of course the Sparta Candles


Be sure to visit Anything Used while in Sparta!


July 15, 2015

Sparta: the Village Collective

Sparta: the Village Collective


Anchored by the art of Shelley McVittie, 
the Village Collective has a great variety of quality artists' wares!

Shelley's art is easily recognizable!
I knew I'd seen it before and I love her work!
What I didn't know was that my daughter knew her! (small world!)


The Village Collective houses paintings, hand knit and crochet pieces, clothing, jams and jellies, and so much more that I don't have pictured. 
You simply have to go - you'll find lots of interest!


July 14, 2015

Sparta: Julia Hansford's Studio

Sparta: Julia Hansford's Studio


I ♥LOVE♥ Julia's art!


How can you not love this?


Be sure to visit her in Sparta!


July 13, 2015

Sparta: Peter Robson Studios

Sparta: Peter Robson Studios

I had the opportunity to visit Sparta not once, but twice, in the past month!

First stop, of course:

As a Girl Guide leader, I love that he painted
The Guiding Spirit.

This is a beautifully well done commissioned painting showing Girl Guides at their best: camping.

Many thanks to Eleanor and Steve for your hospitality!

There is so much variety in the paintings available by Peter Robson, just a few shown in these photos. 


Be sure to visit Peter Robson Studios in Sparta!


July 01, 2015

Recipe - Mesquite Pork Tenderloin Roast

Recipe - Mesquite Pork Tenderloin Roast

(recipe first, story later!)

First off, buy the Club House brand Mesquite Marinade packet.
Don't buy the liquid. I tried it once. 'nuf said.

Next, marinate your tenderloin according to the package directions - with water, vinegar and vegetable oil.
I often take my tenderloin out of the freezer the day before and marinate it in the fridge until the next day - that way it thaws and marinates at the same time.

Cooking time is approximately 40 minutes 
but cooking time will vary 
according to size of tenderloin and temperature of bbq/oven.

Preheat the bbq (to medium) or the oven (to 350 degrees).

For BBQ: 
Remove the tenderloin from the marinade and place on the bbq.
Discard the remaining marinade.
I turn both burners to low and that keeps my temperature at approximately medium heat.
Turn the tenderloin every 10 minutes or so.
Sometimes I cut to make sure it's done, sometimes I don't - it just depends on the temperature of the bbq and the size of the tenderloin. I tend to buy the small ones though.

For Oven:
Remove the tenderloin from the marinade and place in a pan.
Discard the remaining marinade.
Cook approximately 40 minutes or so.
I made my first tenderloins on the bbq so I knew what they would look like when cooked, so if you need to, cut into it to see if it's done and if you need more time. Oven temperatures vary so make sure it is cooked through.


So, here's the story of this recipe!
Years ago I saw the grocery store ad for pork tenderloin on sale for a very very good price - and the photo showed it prepared so yummy! I decided to buy some.

When I got to the store, I pondered aloud "I wonder how to cook it so it looks like the ad". And the gentleman next to me agreed.
That's when the lady next to us said "oh, I know how! Follow me!"
So we did!
She took us to the aisle with the marinades and showed us the Club House brand Mesquite Marinade and told us to just follow the instructions.
And I did!
I have made this on the bbq and in the oven - and it turns out great every single time!

p.s. love the vintage platter eh! It's from the 70s! It's one of my favourites!

June 27, 2015

Tutorial - Tshirt Headband with Celtic Knot

Tutorial - Tshirt Headband with Celtic Knot

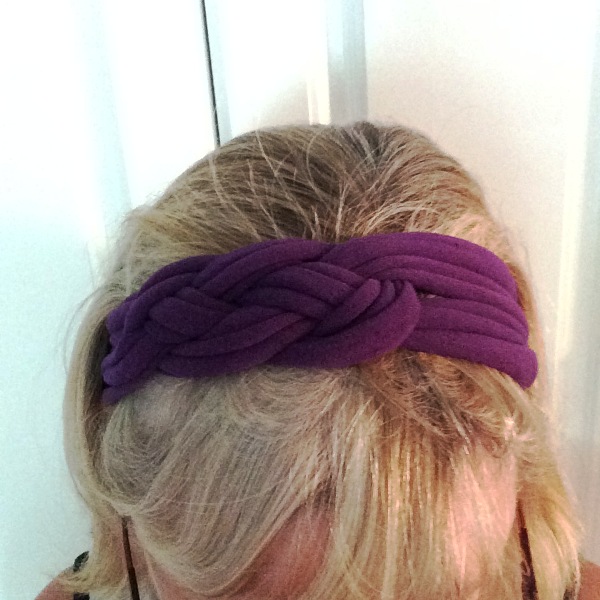
I based my headband on this tutorial (thanks so much!) and decided to add an elastic to it for some easement.

Here is the finished headband!


I started with a tshirt from a fundraiser - it was purple and that is the colour for the Trefoil Guild of Girl Guides of Canada and I was attending the Ontario Trefoil Gathering so I needed to wear some purple!


First cut off the hem at the bottom of the tshirt.


Next, cut strips across the bottom of the tshirt approximately 2 inches wide.


Like this.  And cut 2 for each headband.


Now stretch them out so they curl up - and this hides any logo or whatever that is on the "front" side of the tshirt - it will actually be the "wrong" side or inside of the tshirt that shows.  Nice way to recycle or upcycle an old tshirt!


Here are my 6 strips - enough for 3 headbands!


OOPS!  
I forgot to take photos of me making my celtic knot!
Sorry!
It is the same as shown here though.
(hm, she calls it a sailor's knot and I thought it was
 a celtic knot .. well, I'm not sure so I'll just leave mine as
a celtic knot ~ if you know for sure, leave me a comment!)

Okay, back to the tutorial.

After you make the knot, this is how I did the ends.

I cut a piece from the sleeve about 5 inches by 5 inches.
Fold it in half and sew along one side to make a tube.


The tube should be about 1.5 inches wide.

Turn it right side out. 


Fold under one raw edge. 
I pinned it for the photo.


Now, set the tube aside.  
We'll get back to that.

I sewed each of the ends of my headband to stabilize them.


Then, I cut a piece of elastic about 5 inches long.
Fold it in half.
Sew it to one side of the headband.
I sewed mine about an inch from the end.


Now, take the tube and slide it over the elastic.

Slide the end you turned under (with the pins).


I took the pin out and re-pinned it just past the elastic.

This is because the tube is going to hide the elastic when we are done.


Stitch in place.  
Be SURE to catch ONLY the ONE side of the tube.


See?
When I turn it over you can see the other side is still free.

(edited to add....Hm, actually, there is no reason for this.)
So if you want, you can go through all layers.  :)


Now, reach in from the other end of the tube and pull out the elastic.

Pin it into place on the other end of the headband.

Be sure not to twist the headband!!


Sew that elastic in place, then fold under the tube and sew it into place.

Ta! Da!


(don't look at the grey hairs!! or are they blonde??)

Let me see your headbands!!
Post them on my facebook page here.

June 25, 2015

Only 6 months away!!


Only 6 months left!

That sounds like a lot of time for many of you, but I have gifts to make!
Knitting to do!
Things to sew!
and gifts to crochet!

I am running out of time!

... okay, deep breath, and finish the current project so I can start the next ... one thing at a time ... I can do this.  :)

June 05, 2015

Roasting Marshmallows


Is there anything better than an evening campfire and roasting marshmallows?

It has been years...and I forgot how WONDERFUL a roasted marshmallow tastes!

Mmmmm!

June 04, 2015

World Environment Day 2015

World Environment Day 2015

On 5 June each year people across the world celebrate World Environment Day, and we’re joining in the celebrations!

This year the theme is "Seven Billion Dreams. One Planet. Consume with Care".

Our planet cannot keep up ... (click to read more)...


June 01, 2015

Happy June!

It's a chilly start to June today, 
but there is the promise of 
summer 
on the horizon!