Tutorial - Melted Crayon Art
I saw some melted crayon art over the past months (years?) and I wasn't inspired to make my own or take on the task of sharing this art with my Girl Guides until I saw this one on Pinterest!

I ♥ LOVE ♥ IT!
So we ARE going to do this with our Girl Guide unit!!!
And I very rarely test things before I dive in and learn at the same time as the girls.
But not this time!
This time I did a trial run.
And here it is!

What you'll need:
♦ crayons
♦ knife, only if you are going to cut your crayons
(we are going to pre-cut them in preparation for doing this with Girl Guides)
♦ artists canvas (mine is 8x10 from the dollar store)
♦ glue gun and glue sticks
♦ newspapers
♦ embossing heat tool or blow dryer
(editted to add that I used the ebossing heat tool because when I tried a blow dryer, I had it on high. After I made mine, I was told that a blow dryer should work if you have it on low, not high)
(editted to add that I used the ebossing heat tool because when I tried a blow dryer, I had it on high. After I made mine, I was told that a blow dryer should work if you have it on low, not high)
♦ Sharpies or other permanent markers

I used cheap crayons I picked up for 25 cents a box at back-to-school time.

I marked a piece of cardboard with how long I wanted to cut off the crayon.


Roll the crayon as you cut into it. (thanks for the tip from this blog!)

Here are my cut crayons.
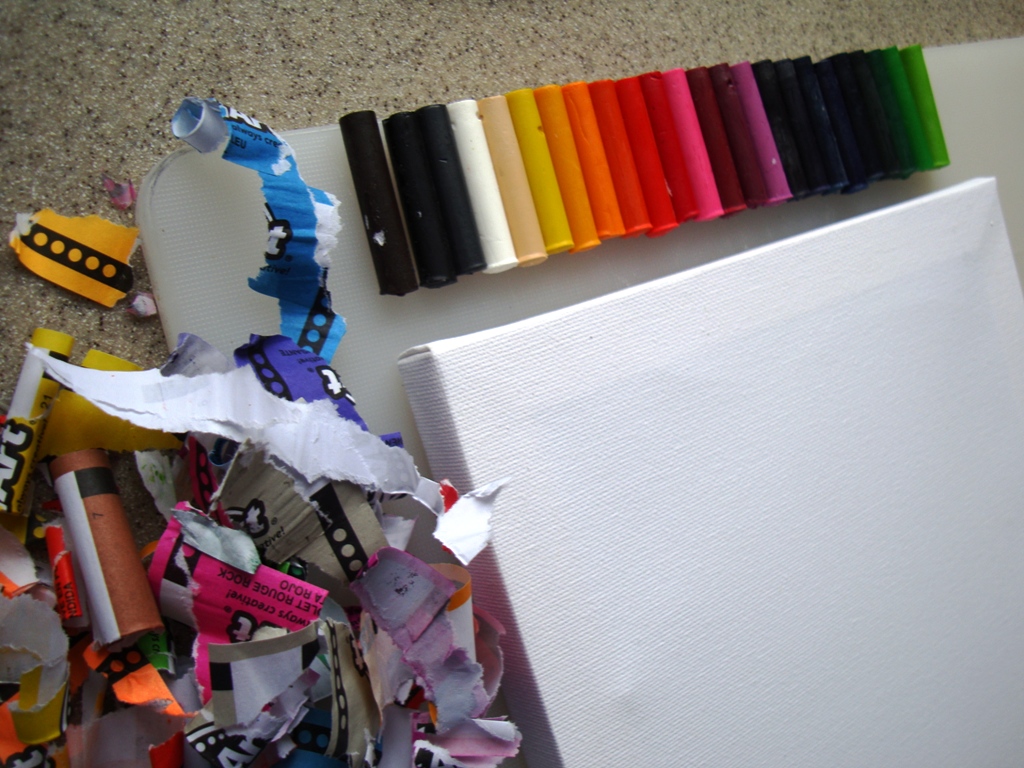
And I wanted to remove the wrappers.

Attach the crayons to the canvas with a glue gun.

Now, spread out the newspaper, and heat your crayons.
Lift your canvas so the crayons melt down the canvas.
With the girls, this part will require supervision.

Looks good eh!?!

And then writing with the markers.
Here are a few extra tips:

If you touch the crayons with the glue gun, the crayon will melt onto the tip of the glue gun and make the glue turn colour.
Don't do that.
Blow Dryer vs Heat Embossing tool:
Editted to add that when I tried a blow dryer, I had it on high. After I made mine using the embossing heat tool, I was told that a blow dryer should work if you have it on low, not high
Editted to add that when I tried a blow dryer, I had it on high. After I made mine using the embossing heat tool, I was told that a blow dryer should work if you have it on low, not high

I did try the blow dryer first and the wax just went nowhere.

Then it went everywhere but it was thin.
Sharpie vs Stabilo markers.
Sharpie vs Stabilo markers.

I tested my markers in an inconspicuous spot to see which would write better.
And a few Before / After shots! Just for fun.

Before

After

Before

After

Before

After
And a few close ups because they look cool.


And this is the embossing heat tool I used:

Editted to add that when I tried a blow dryer, I had it on high. After I made mine using the embossing heat tool, I was told that a blow dryer should work if you have it on low, not high
And here is my finished product!!


I can't decide which is my favorite - the beautiful melding of the melted crayons or the perfect sentiment!
ReplyDeletethanks! :)
DeleteI love this idea - really beautiful results! Thanks for sharing at the DIY party at Pleasures of the NW.
ReplyDeleteThanks so much! I missed the May 1 DIY party and hope to join the next one!
DeleteWhat a beautiful message and craft! Love all the step by step pictures and explanations! Thanks for sharing with #SocialButterflySunday! Hope to see you link up again this week :)
ReplyDeleteThanks! Yes, I hope to link up again. :)
DeleteThanks for sharing on the Pleasures of the NW"s DIY party! I'd forgotten about this project and I'm glad you reminded me!! I even have the canvas!
ReplyDelete