r-anne-dom : a place for me (anne) to leave random blog posts.
Such as:
..knitting, sewing, and other random activities pursued
..Girl Guides of Canada : yep, Guiding Lives Here
..the 4 shops on Etsy : one features quality handmade items; the second has lots of patterns, & crafting supplies; the third is stocked with Vintage; and the fourth is guiding flowers.
Enjoy the r-anne-domness!

November 13, 2020

Tutorial: Marble Maze


DIY Marble Maze

 Tutorial
Marble Maze

Materials:
- 2 coordinating pieces of fabric
- marble or similar sized bead

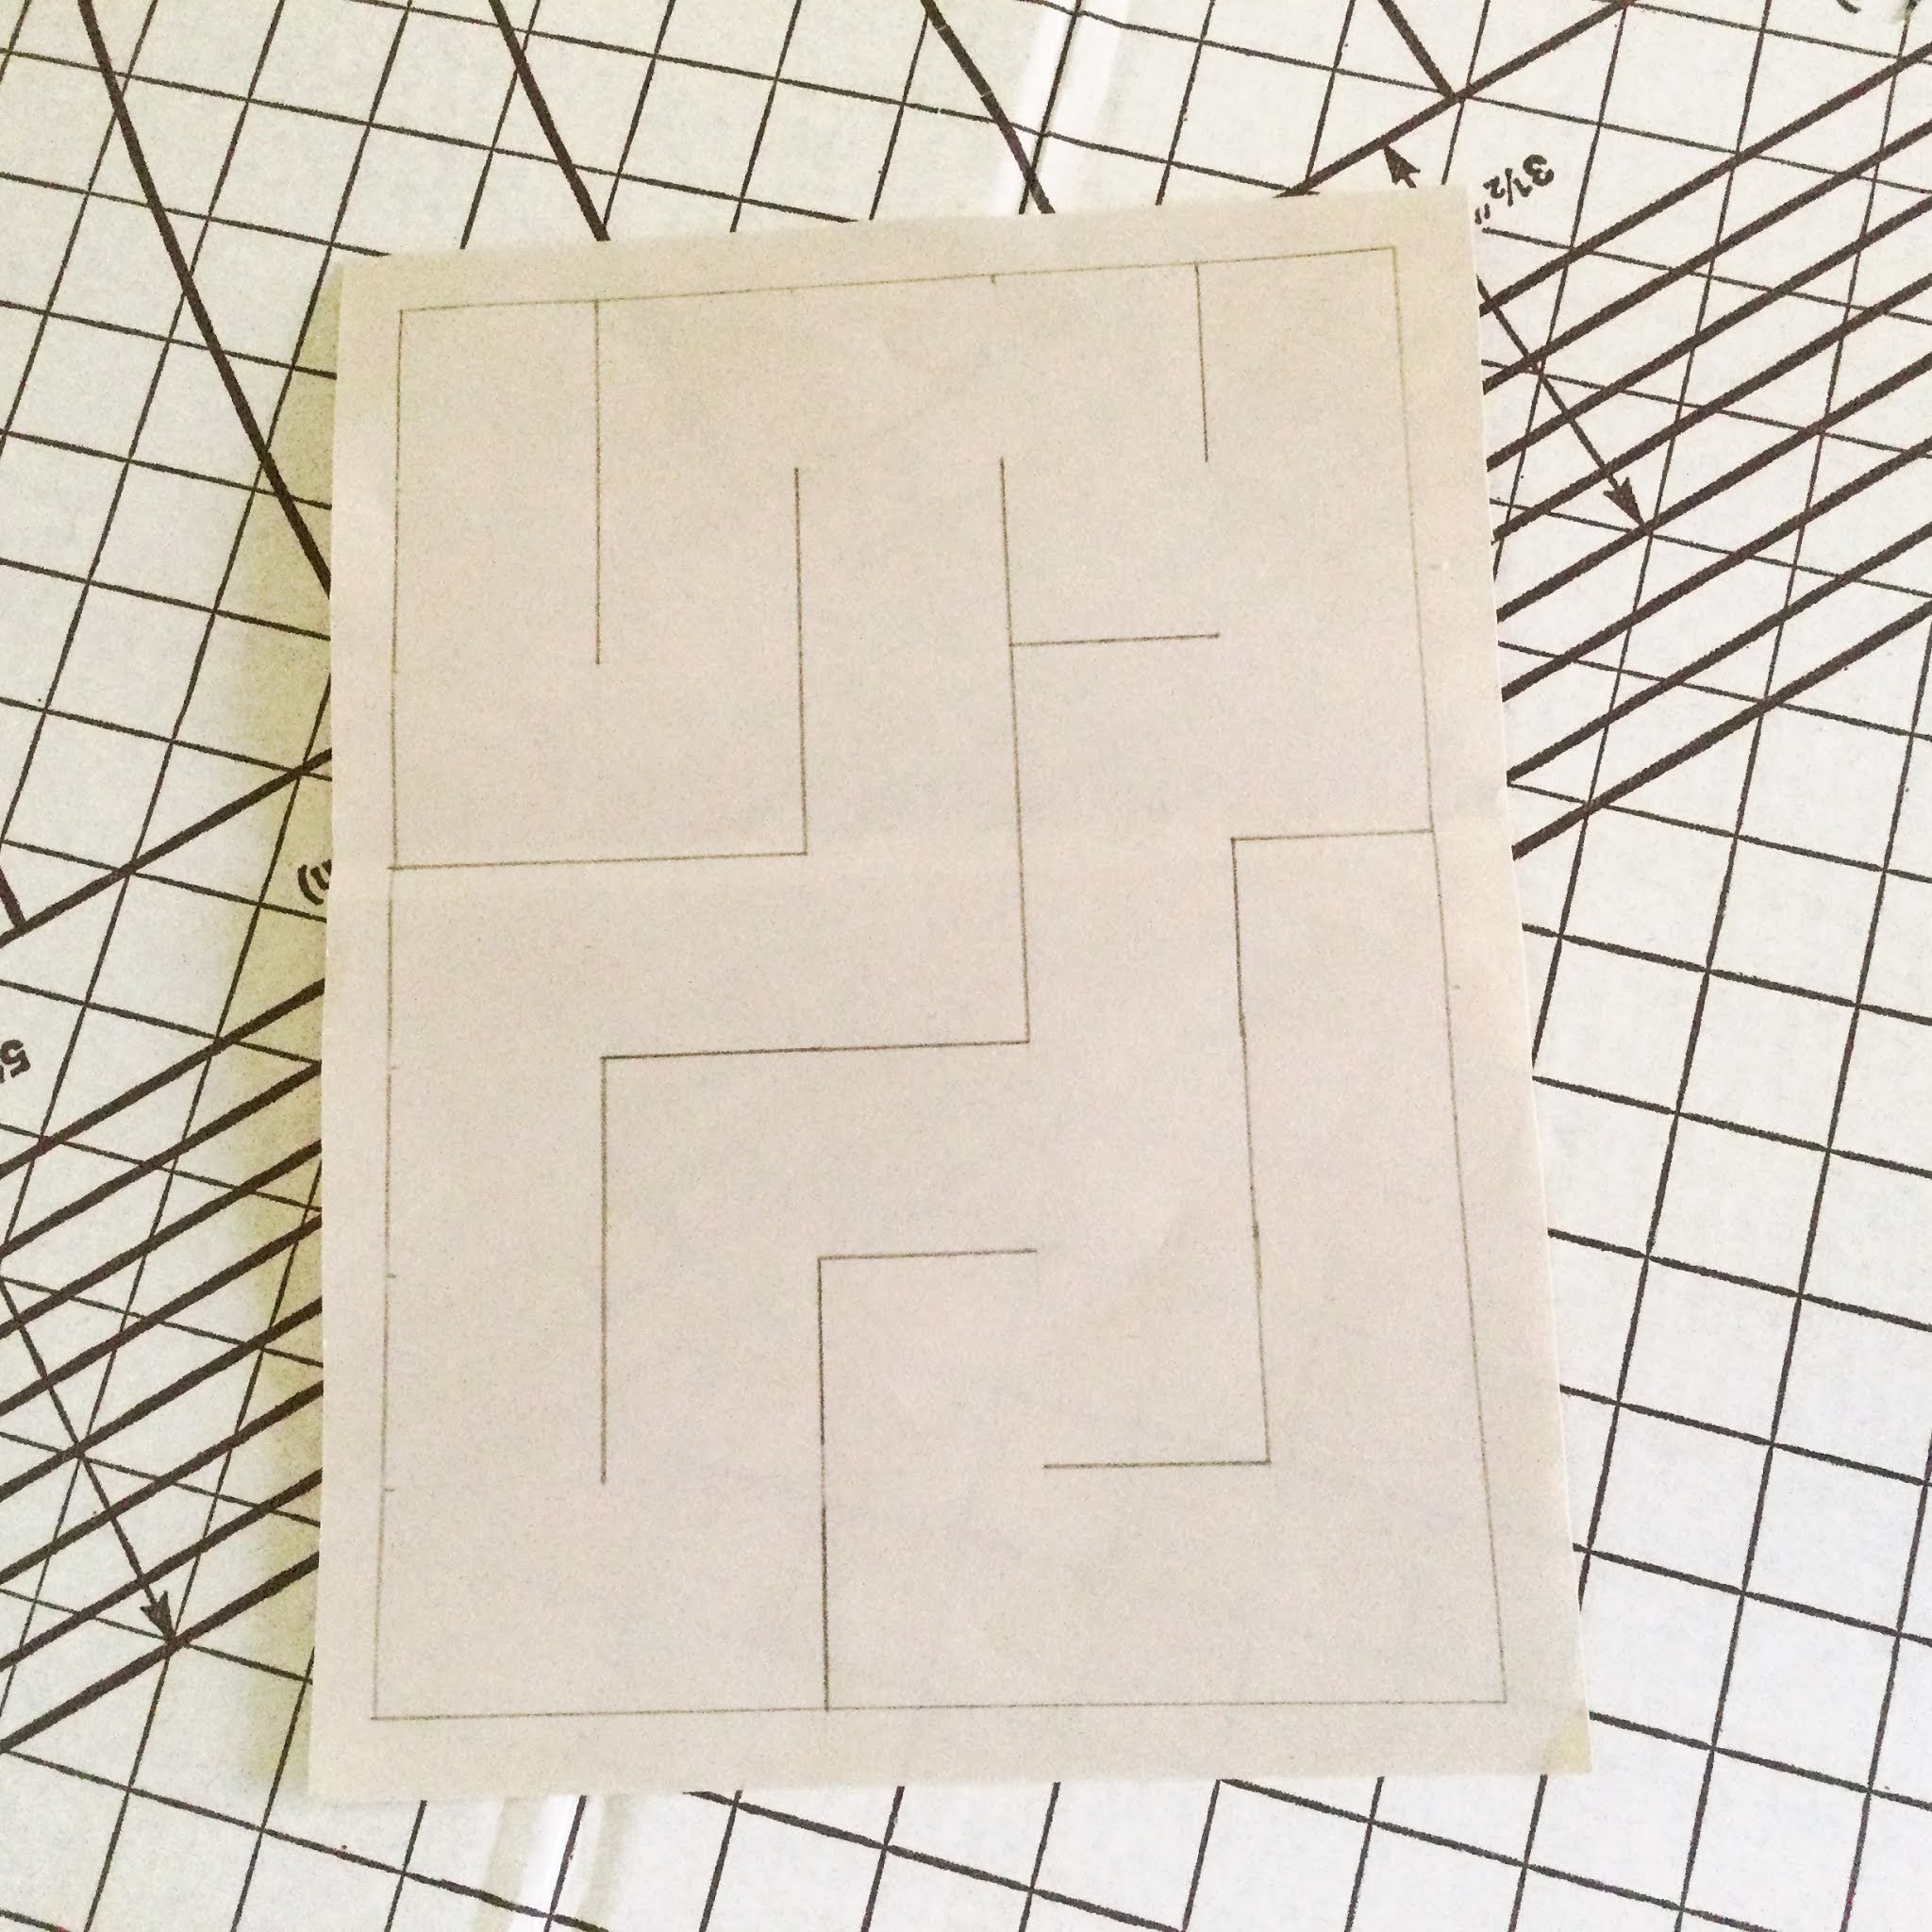
Below is the pattern I made for the marble mazes I made.


I have seen them in varying sizes depending on need and recipient.
Mine were for a long term care facility so I wanted them large enough that the seniors would be able to use them and not lose them.

Cut 1 from each of your fabrics.


With right sides together, pin all sides, leaving a space to turn it right side out after sewing.


Sew all around (except for the space you left open!).
Trim your corners for less bulk in the corners when turned right side out.


Turn right side out.
Note the opening in the photo below, for the marble or bead.


Insert the marble or bead now.
LOL - full disclosure - on my first one, I forgot! 
And sewed up that opening before I added the marble.  Oops! 
Learn from me! Insert it now. :) 


Now sew all around the outer edge, as close as you can get, closing up the opening along the way.
I like to start and finish at the opening so that it has a double stitch.


Now you get to draw the maze!!
These are the 2 I used.


I have seen some that are very simplistic.
And some that have "dead" spaces where the marble or bead cannot access. 
How you design yours is up to you.


I also designed mine so the marble or bead would be very easy to maneuver. 

If you want yours to be tighter, you will need to make the lines closer together, so moving the marble or bead is more difficult.

So now you need to transfer the maze pattern to the fabric.

Hmmm.

For this one, I laid the pattern over top, and by folding and checking, I made pencil dots at all the ends of stitches, and corners, to guide me as I stitched.

It wasn't the best method!!

Then I learned - and I punched tiny holes at those same points.
And used the holes to make the pencil marks on the fabric.
The pencil marks will wash out, but chalk might be a better bet.
For dark fabric, I coloured over the holes with a white piece of chalk.


Now, stitch the maze lines.
Move the marble or bead out of your way as you go.


Here are 2 completed mazes using my maze designs.


Here is the dark side of each one. 
I used a contrasting thread to show the design.
No, I'm lying.
I used a contrasting thread because it was in the bobbin and I hate changing the bobbin spools!! LOL


So that's it!!

Would make a great project for community service!
Useful for all ages.

Take care.
Stay well.


March 23, 2020

Tutorial: Carpet Bag for 18 Inch Dolls

DIY Carpet Bag for 18 inch dolls

Tutorial
Carpet Bag for 18 Inch Dolls or similar sized dolls


I actually made this particular carpet bag for a topsy turvy doll I made for a lovely lady who is a fan of Anne of Green Gables. As I was preparing to make it, I realized it would be the perfect size for an 18 inch doll so I quickly made notes and took photos so I could do a tutorial. Sadly I never thought to take a photo of the finished carpet bag with my 18 inch doll.

I used upholstery sample pieces of fabric for my carpet bag.

I tried to choose colours that would most resemble a carpet, thus the term carpet bag.

Materials:

- 2 coordinating pieces of fabric
(see photo for measurements, though if you read through the tutorial, you'll see that you can use a smaller piece for the upper portion of the bag)
- medium-large button
- cording or leather for handles
(I used macrame cording)
- fabric or leather scraps for the squares that cover the ends of the handles

Below are the original dimensions that I used for my carpet bag.
I ended up adjusting the top portion of my bag so probably could have used 2 pieces that were 3.5 instead of 4.5 inches wide. Please see my photos below to see if that will work for you.

Here are my 3 pieces laid out.
 

With right sides together, sew the 2 seams.
Then, top stitch so that the seam lies flat.

Pin the side seams.
Sew the side seams.

Take the bottom corners and flatten them so that they look like the below.
This will provide boxed corners.
Sew across the corners.

Turn the bag right side out.
Fold the top edge to the inside.
This is where I folded a LOT to the inside. I probably could have cut less fabric but I was winging it at the time, and documenting as I went along, so no do-overs! :) 

Here you can see I've folded over quite a bit.
If you'd like, sew that top seam now.

I tend to combine steps if possible so you'll see I do the top seam and handles in one step.
You don't have to! 
 Sew the handles in place now.

Place the squares over the ends of the handles.
I had hoped to have scraps of leather to use but didn't have any, so I just used the same fabric as the top of the bag. I think it would have looked better with a contrasting leather square instead.
Sew the squares in place.
As with all handles, I sewed the box and the X to provide maximum durability for the handles.

Sew the decorative button in place.
 And you're done!

I didn't finish the edges inside as I didn't think it was necessary in my case. 
I know it will be used simply for decorative purposes.

Thanks all.