r-anne-dom : a place for me (anne) to leave random blog posts.
Such as:
..knitting, sewing, and other random activities pursued
..Girl Guides of Canada : yep, Guiding Lives Here
..the 4 shops on Etsy : one features quality handmade items; the second has lots of patterns, & crafting supplies; the third is stocked with Vintage; and the fourth is guiding flowers.
Enjoy the r-anne-domness!

October 15, 2016

Saturday Spotlight: From My Garden - a New Book!


Saturday Spotlight

From My Garden - a New Book!


Gardening, in recent years has become a popular hobby and as the population of baby boomers retires the interest in horticulture increases. But more important, there also has been a heighten attraction from the younger generations.


The focus to get back to one’s roots, in a matter of speaking, seems to be one of the forces that draws people back to the garden. Whether you were raised in the country or remember those wonderful visits to your grandparent’s farm, it’s all about working with the warm soil, planting seeds and nurturing those plants to produce beautiful blooms or delicious vegetables.


I love my garden. It has taught me so much over the decades – patience, tolerance, acceptance, and the wonderment of Mother Nature. All of this inspires me to share my experiences and knowledge to get people excited about gardening and the food it produces


 I wrote this book ‘From My Garden’ earlier this year to encourage people to have fun  growing your own food and preserving the harvest. I enjoyed sharing my stories and secrets about the garden as well as some of my unique preserving recipes.


Nancy Abra


October 11, 2016

Free Pattern - Crochet Oval Rug

Free Pattern - Crochet Oval Rug

My mom started to crochet this oval rug pattern.


She gave it to me when I asked her if she had any macrame yarn. 
It was in the bag with all the yarn.

I don't plan to finish the rug. 
It turns out that it's the perfect size right now, for a table runner for fall!


So I finished it off. 

And here it is: all ready for Thanksgiving.

<< Thanksgiving Photo >>

And here is the pattern.
I didn't want to just throw it away.


p.s. I used my mom's partially finished rug for my table runner this Thanksgiving.

Perfect!

October 08, 2016

Saturday Spotlight - The Turtle Shop


Saturday Spotlight 

The Turtle Shop


1. What is the name of your shop or business and what do you sell?
My business is The Turtle Shop.
I make handmade chocolate turtles with 5 filling options as well as an additional seasonal filling.

mint
coconut
 2. Where are you located? or where do you sell?
My turtles can be ordered through my Facebook page, email, website and picked up from my home in Hyde Park in London ON. 
I also participate in local craft shows, I always post on my Facebook page when I'll be attending an event so to always know where I'll be, I ask that people "like" my business page

They are also available in 5 store locations in London & surrounding area...

22527 Adelaide Rd
Mt. Bridges, ON

797 Talbot St, unit #3
St. Thomas, ON

1018 Dundas St
London, ON

176 Main St
Lucan, ON

569 Richmond St
London, ON


3. Do you have your own website/store or online link?
And Facebook page https://facebook.com/TheTurtleShop  as well as 
a business email theturtleshop@hotmail.com, orders can be placed by any method. 
I also have an Instagram page for anyone wanting to follow its the_turtle_shop


4. How long have you been doing your craft/art and how did you get started?
I have been making turtles for 20 years, I got started by helping my grandmother make them. 

5. Who or what inspires you to create?
My inspiration comes from my grandmother. 
Making turtles during the Christmas season was something she enjoyed doing as a holiday tradition, sharing them with friends and family that would stop by during the holidays as well as gifting them. As people's love for them grew, it slowly blossomed into a small Christmas business for her. 
The popularity of Mrs. Watsons turtles grew to a whopping 400+dozen ordered from the months of October - December. Although grandma is still with us today her arthritis no longer allows her to carry on. The business grandma had has since been taken on by me to a larger level and The Turtle Shop was born. 


6. Do you listen to music when you work, and if so what kind?
I often listen to the radio while working it's mostly new hits or during the Christmas time of course I have Christmas music on

7. What do you like least/most about your craft?
The least thing I like about making turtles is the strain it puts on my arthritic hands during the busy season. My hands definitely need a break after Christmas 
The thing I like most is hearing people's reaction or reading someone's review when they try them. It's very nice to put a smile on someone's face because of something you've created. ❤️
baby showers
baby showers


baby showers

8. Describe your workspace?
My workspace is a number of different locations...a kitchen, shops, my home, my van and pretty much anywhere I am. I am normally just a click away 😉  
All of these locations play a very important role in my business. 

wedding favours

9. What is one of your best moments as a crafter/artist?
One of the best moments was telling my grandmother that I was carrying on with her business on a much bigger scale, and having her approval and best wishes for success. 

10. What advice would you give to anyone thinking about starting their own craft business?
For anyone thinking of starting a craft business the advice I'd give is, start slow and grow slow. There's no worse feeling, than the feeling of taking on too much, too quickly and getting swamped. That's the point in which you can become overwhelmed and may no longer enjoy doing your craft.


October 06, 2016

Tutorial - Busy Book - the Binder


Tutorial 

Busy Book - the Binder

This is how I would recommend this be done.

We used a paper-like binder that had some sort of laminated finish to it.

It was fairly small and thin, so it was what I wanted.


We removed the rings from the centre.


Below you can see the fabric pinned in place.


The white and blue pins in the centre mark where the spine is.
This is what inspired me to add the "braiding" feature.

Below is the book just before gluing it to the binder.


This is where my original plan fell apart.

I planned to use a spray adhesive.
On both sides of the binder.

What I did, didn't work so well.

So what I would recommend, is to mark where the centre is - where the book will fold down over the binder.
Mark it with pins first.
Then, turn it over, and on the inside, mark with chalk or similar - draw the line. 
This is where the top edge of the binder will go.

Then spray the binder, both sides.

Your hands will get sticky. 
The binder is sprayed.
You have to touch it to put it on the book.
Sorry.
Please leave a comment if you can do it without getting sticky!

Anyway ...
Put the binder in place on one half of the book.
Fold the book over the binder.
Try to smooth it as best you can.
The way I did it, this was next to impossible - I think this way might work better.

At this point, all your seams (3) will have raw edges.
Fold them under so all the raw edges will be inside.

On the one edge, I added a piece of bias tape for a loop to hold the book closed.

Then, if you can fold them but leave a bit of room, you can sew them with your machine.
I actually did this and it worked okay.
I don't know how to describe that, but play with it a bit and you'll see what I mean.

Or you can sew them by hand with a slip stitch.
Please leave a comment if you try this!
I'd like to know that someone had better luck than me with the spray adhesive part!

Finished book.

Can you see that I sewed the bottom seam with my machine?

The front cover - a little wrinkly.

October 04, 2016

Tutorial - Busy Book Inside Pages


Tutorial 

Busy Book Inside Pages

Here are more details on how I made the pages for Kaelyn's Busy Book.

Please note I jotted down measurements but they may not be the final size of the item in the book.
I made adjustments as I went along and forgot to mark down when I cut something to fit.

The floral fabric is the main cover for the binder and
it is approximately 24 inches x 25 inches so that when
it is folded, the size becomes 24 inches by 12.5 inches.

These photos generally show just half of the cover because it is folded over the binder.


Buckle:

I had a long thin scrap of fabric that I cut into 2 pieces, 
each was approximately 7 inches by 2 inches.

I sewed the buckle activity approximately 5 inches from the top of the binder.


Shoelaces:

The background for the shoelace activity was a scrap of fabric with sandals and flip flops on it!
It was approximately 12 inches by 6 inches in size. 
I turned under the edges and pinned it in place.

I made a small paper "pattern" for the 2 "shoe pieces" where the eyelets would be.
Those "shoe pieces" were approximately 4 inches by 3 inches with 2 rounded corners.


Ladybug "Sewing":

This was fun to try.
I saw something similar in another busy book so I wanted to see if I could do it.

I used a long scrap of pink fabric that was 20 inches by 3.5 inches.

I folded it in half so that all the raw edges would be hidden inside.

I measured and marked approximately where the 4 holes would be on one half.
Then I marked the 4 holes in the same spots on the other half.

I cut an X at each mark.
Then I folded back the X triangles and pressed them down.

Fold the long strip so all those X triangles are on the inside.
Stitch around all the squares.

Finally, I folded under the long and short remaining edges and sewed them closed too.


Here is what the left side looked like when completed:


Zipper Pouch:

The bottom part of the zipper pouch is lined.
The lining and outside fabric pieces are each approximately 11.5 inches by 6 inches.

I attached the zipper to the lining and the outside fabric.
I turned under the outside edges of each fabric so they'd be in between the 2 fabrics.

The top piece is approximately 11.5 inches by 3 inches.
I attached the zipper, folded it in half lengthwise and turned under all the edges.

I added a piece of seam binding to cover the opening at each end of the zipper to give it a bit more of a finished look.

NOW.

BEFORE you sew the pouch to the background, add the scrap flaps with button holes.
I just made these out of scrap fabrics.

I sewed the buttons on after the entire project was pretty much complete.

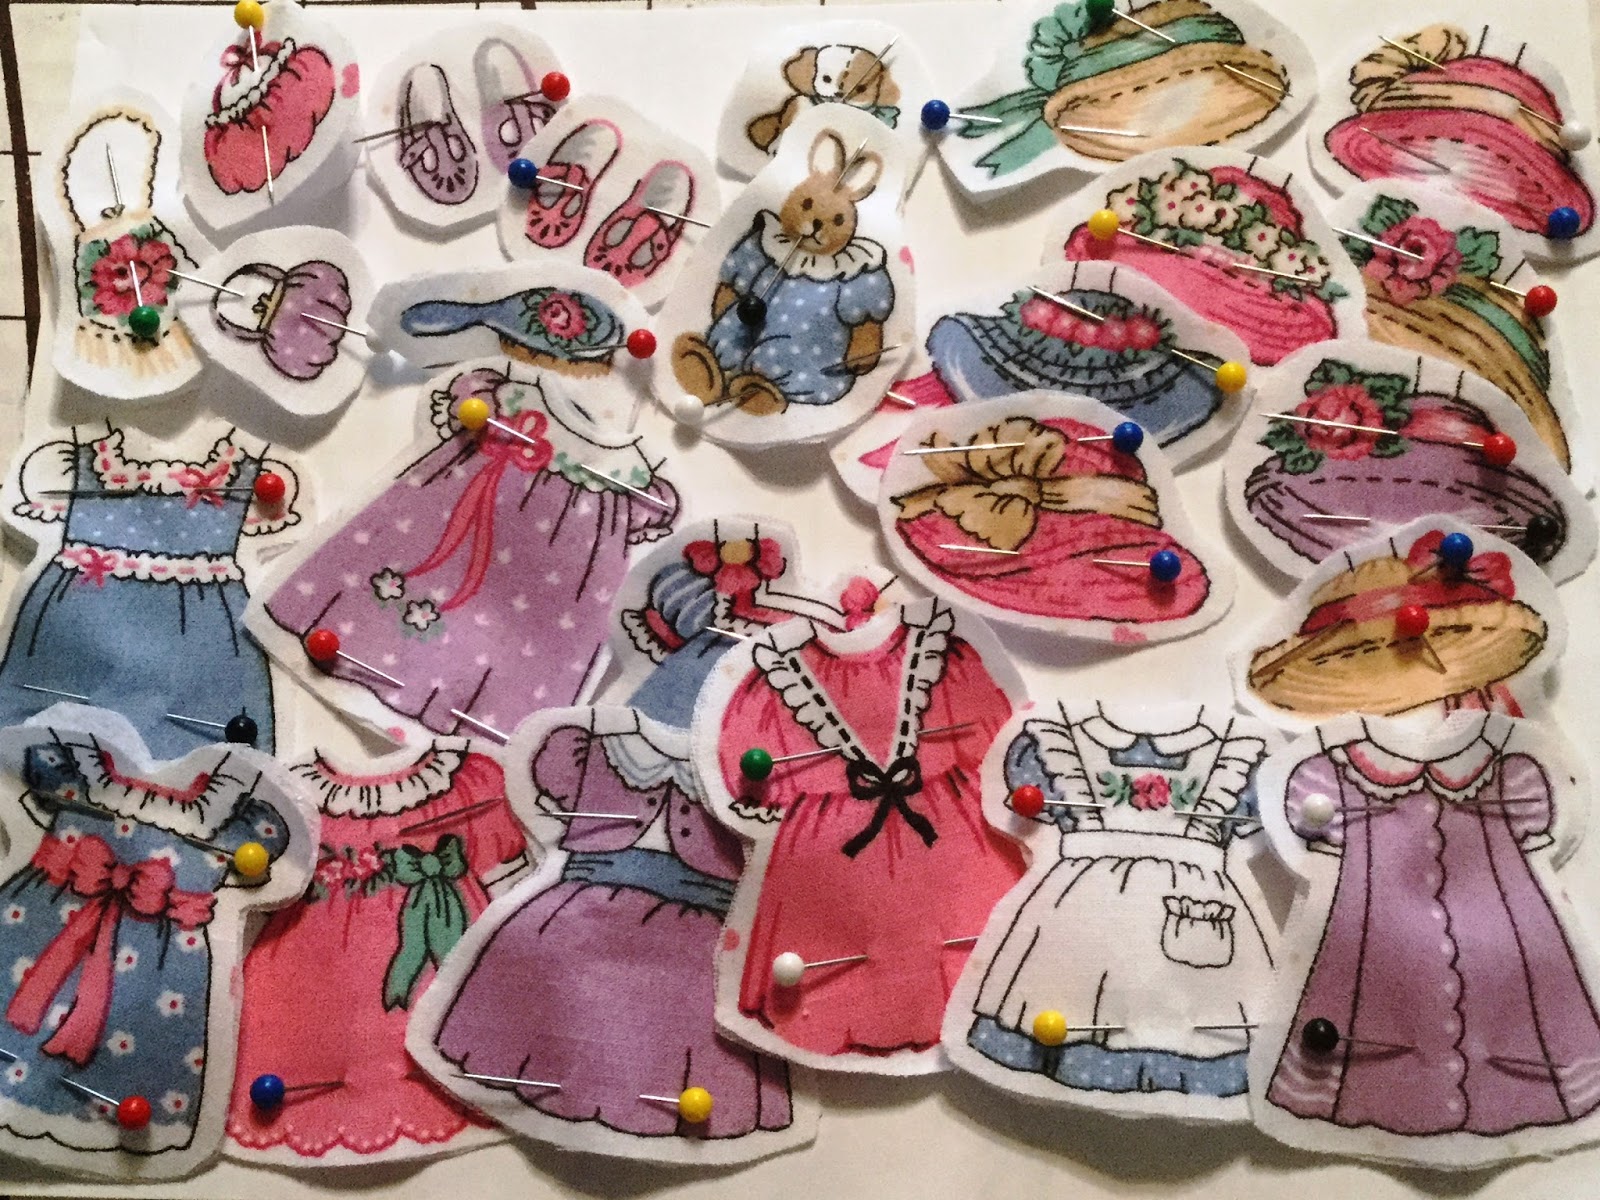
"Paper" Doll and "Clothes":

This was a cool fabric I'd picked up some time ago.
I knew it would be neat to add it to this project.

I used iron on stabilizer for each piece and left a small seam allowance when cutting out each piece.


I made sure to sew the velcro to the NON iron on side of the stabilizer FIRST.


THEN I ironed them.

And then I stitched around each piece.

You know, just because I've got lots of time. ☺


First I sewed the doll to the background.

Then I sewed velcro to the "doll" AFTER I sewed her to the floral background of the binder.

This way, the velcro would be more secure.

I added a piece of velcro just to the right, for the "toys" or purses, or whatever.
Another tiny piece of velcro near her shoes for the extra shoes.


Above shows the velcro.

Below shows the "doll" all dressed up.


The little pouch with the clear opening was a bit of a pain to make. 
I sewed some bias tape to the top first.
Then I added the half of the snap.
Then I took seam binding and put it both under AND over the square of plastic around 3 sides.
I sewed those sides down.
I made a flap similar to the button flaps, adding the other half of the snap.

Here is what the right side looked like when completed:


"Rapunzel" Braiding:

For this, I simply cut another "doll" head from the fabric and sewed it to the background.
I made 3 long strips of fabric out of scraps.
I covered the top end with a scrap of lace to hide the ends.
I tied knots in the bottom ends.

So that's it.
Other than gluing the entire thing onto the binder.

We'll cover that in another post.  
I'll link to it as soon as I do that.

Please leave a comment if you make a book - I'd love to see it!


Click Here for Busy Book - the Binder (Cover)