r-anne-dom : a place for me (anne) to leave random blog posts.
Such as:
..knitting, sewing, and other random activities pursued
..Girl Guides of Canada : yep, Guiding Lives Here
..the 4 shops on Etsy : one features quality handmade items; the second has lots of patterns, & crafting supplies; the third is stocked with Vintage; and the fourth is guiding flowers.
Enjoy the r-anne-domness!

December 16, 2015

Tutorial - Bow Pillow

Tutorial - Bow Pillow


Here is a tutorial to provide more detail in making the "Bow Pillow" as shown on the Kate Spade blog here: click.

First I measured my pillow insert.  

Next, before cutting the fabric, I draped it over the pillow to check for overlap.
I want my pillow cover to be removable so I'm adding extra to make an opening.

My pillow was 21" x 15".
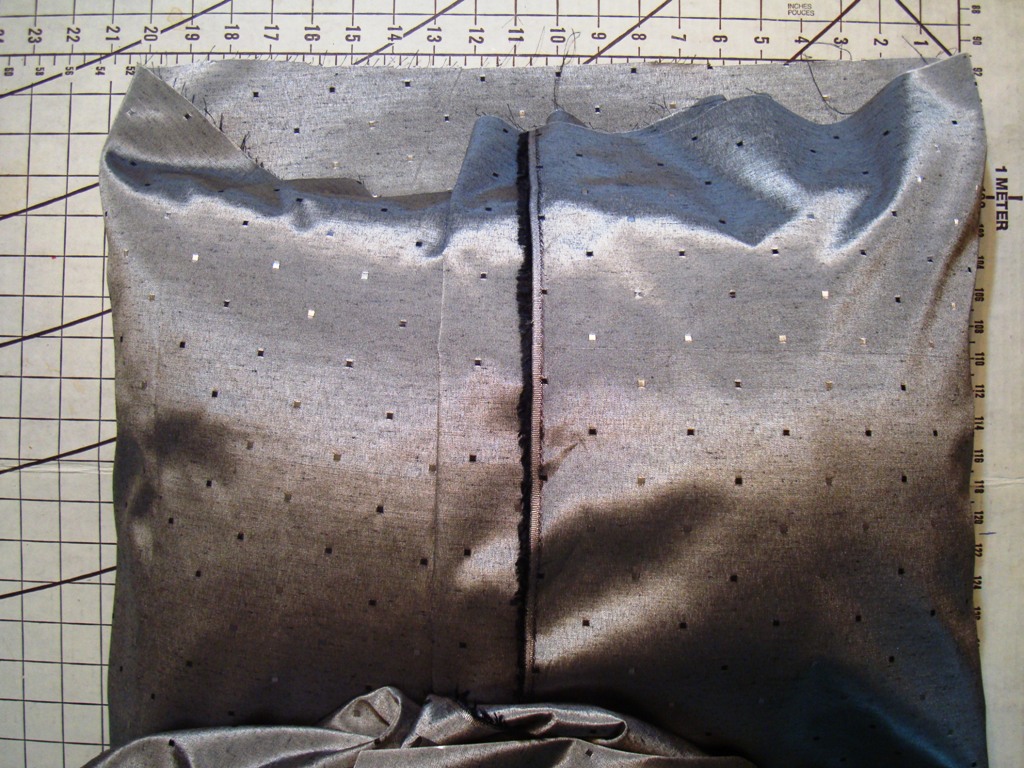
I cut my fabric to be 54" x 16.5".
(The fabric above is folded at the 27" mark.) 

I sewed a quick hem on both 16.5" ends.
They will be folded when I make the opening for putting the pillow insert inside.

I put the pillow insert inside the cut fabric and marked where the opening would be, and where the centre would be for the tucks as mentioned on the Kate Spade blog.

Here is the marking for the tucks. 

Sewing the tucks.

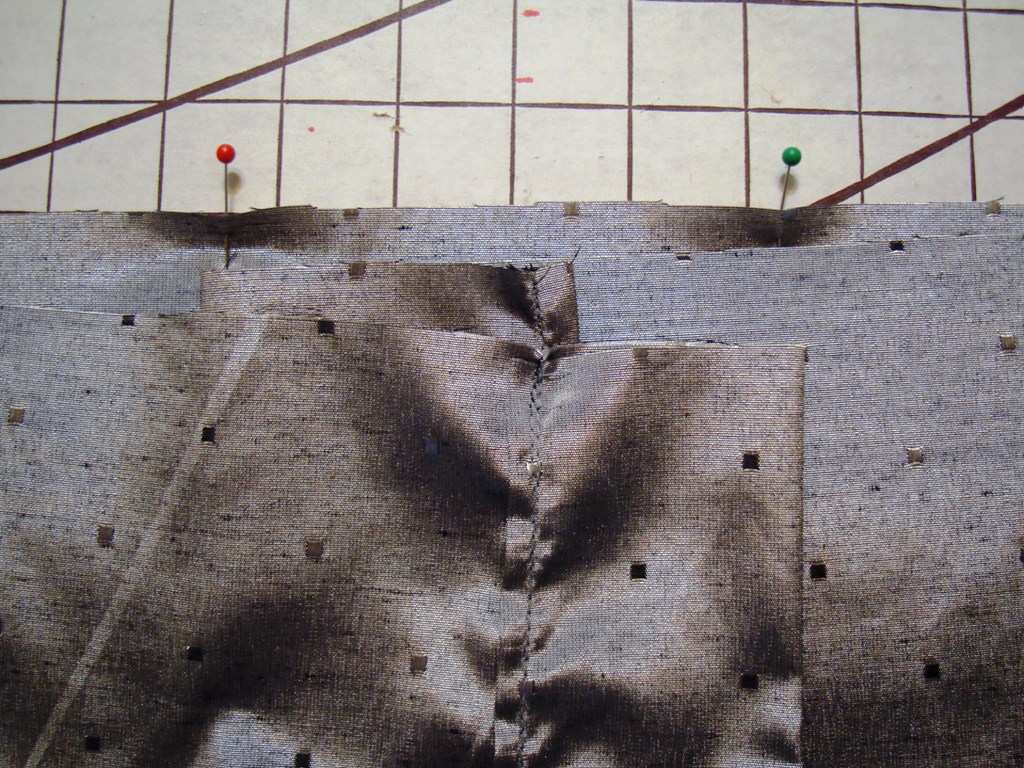
Now, the overlap for the opening was marked earlier.
So I lined up my hemmed ends and folded them to give them nice wide hems.

Here they are pinned in place.

Pin the long seams.

All sewn up! 
And the pillow insert has been inserted!
Now...just the band left.

I took a scrap piece of fabric and used it to measure the length of the band.

Here is the scrap - with the pin marking how long I need the band to be...27" 
(hm, what a coincidence!)

I followed the instructions on the Kate Spade blog to make the band about 12-14" wide, then folded and seamed along the long edge. 

Pinned in place, and I could have cut it shorter - probably the 23" the blog suggests would have been fine. 
I marked both ends of the band with pins. 
This is so that when I hem and sew it together, I know exactly how long I want it to be.

Hem one of the short ends. 

Insert the other short end into the hemmed one. 

Here is where that pinning came in handy.
I had pinned the band when it was around the pillow.
Here you see the one end inserted until the pins meet.
I sewed straight across through all layers.

And there you go!
Done!

Looks lovely eh!


November 24, 2015

Christmas Sewing patterns


Christmas Sewing patterns

There is still time to order your Christmas sewing patterns at PatternsAndSuch on etsy


The Guiding Spirit

The Guiding Spirit


A commission by Sir Peter Robson

This painting celebrates the ideals of the Girl Guide movement from its founder, Baden-Powell, right to the present day. The standards that he outlined are being respectfully carried out by the Girl Guides all over the world today and the spirit of guiding is alive and well.
close up of the print title

close up of artists mark

Prints will be rolled and mailed in a mailing tube.


This is how my print looks after I framed it. 
I did not have it professionally framed.
I took the print with me and found a frame I liked...the white part of the print was slightly larger than the opening in the frame, so I *gasp!* cut the white part to fit the frame.
For me, this worked fine.
Alternatively, you could go with a professional matting and framing as with this one at Robson Studios.
(difficult to get a good photo without reflection but the print sure looks great with the matting.)


November 14, 2015

Recipe - Greek Spaghetti

Recipe - Greek Spaghetti


This recipe has been adapted from a recipe we received from a cafeteria where hubby once worked.

The original recipe was written down quickly and makes a much larger serving size so I have scaled it down to make about 2 loaf pans.


Ingredients:
1 tbsp butter or margarine or oil
1 green pepper, chopped
1 onion, chopped
1 10oz/284ml can mushrooms, chopped
1 28oz/796ml can diced tomatoes
1 pkg (375g) spagettini or spaghetti pasta, cooked
1 cup of cheddar cheese, grated (we prefer Old)
2 cups of mozzarella cheese, grated
1 envelope onion soup mix
1 375ml jar of olives, chopped
1 10 oz/284 ml can mushroom soup

Spray 2 (or maybe 3) loaf pans with non-stick spray.
Cook pasta.
Saute onions and mushrooms.
Add peppers and olives and continue to saute.
Add tomatoes and simmer 10 minutes or until heated through.

Spread a layer of pasta in the pan.
Top with sauce, cheddar and mozzarella.
Repeat with another layer of pasta, sauce and cheeses.
Spread mushroom soup on top.
Sprinkle onion soup mix on top.

It should look something like this:

Bake in 350 degree oven for 30-60 minutes or until bubbling and thoroughly heated.

Let stand 10 minutes before serving.


Can be frozen.

Leftovers (if there are any!) can be frozen too.

Did you notice?
No meat.  
A meatless dish that doesn't taste like it's vegetarian!


Saturday Cyber-Mall

Saturday Cyber-Mall

Welcome to the Saturday Cyber Mall!


Shop "Small" Business today!

Please share your links with the host blog:  Christie Cottage

Happy Shopping!
Happy Sales!
Happy Saturday!

Shop at the Saturday Cyber Mall

November 08, 2015

Get Connected Again - Paper Memory Crafts

Get Connected Again
(Held Sat.Nov.7 in Tillsonburg)

What a great day!!!

Session 4: Paper Memory Crafts
Perfect for scrapbooking and presentations.
Let your girls complete program requirements and bring home something very worthwhile.

This is a very brief overview of each activity and I cannot remember in full detail each instruction. 
PLEASE feel free to leave a comment if you have more information and I'll update this post. 
Thank you!

In this session we were introduced to several paper memory craft ideas.
I started several of these ideas but didn't complete one, so the photos are the samples from class.

1. Photo Frame or Memories Plaque
Card stock with holes punched, ribbon added, and decorated.
Many uses discussed.

2. Paper Bag Booklet
2 paper bags with SQUARE bottoms (important - not flat)
Sewn up the middle before class.
Decorate.
Many uses discussed.

3. Accordian Booklet

Oops, this one was glued wrong.
:)
Decorate.
Many uses discussed.

4. Puzzle Booklet
Squares on end are card stock. 
3 squares in the middle are double the size of the end squares.
eg. ends are 2" square, middles are 4" square.
Glued and folded to make the puzzle above.
Hopefully I can figure out the glue and fold from the photo above!
That's what I'm hoping.
Otherwise, google and/or pinterest will have to rescue me!

5. Tag Booklets (no photo, sorry)
Using tags approx. 4" x 1.5", attach 4-5 together with string or a key ring or similar
Decorate each tag
Add a photo to each side to make a mini photo alburm
or
Add an activity to each side that the girl may complete while at camp
or
Use as a mini autograph album
or
whatever you decide!

I think ALL of  these can be used as Camp Challenge booklet ideas.
Here is the one I've used in the past Click This Link.
But when I did that one, I just made it and handed it out.
If I use the above ideas, the girls can make them the first evening of camp, then use them all camp long. I think they'd have more of a vested interest in completing them.

See MORE from Get Connected Again here, and here, and here!

Get Connected Again - Wheat Weaving…Easy!

Get Connected Again
(Held Sat.Nov.7 in Tillsonburg)

What a great day!!!

Session 3: Wheat Weaving…Easy!
Learn some of the history behind the art of wheat weaving.
And try your hand at two designs, St. Brigid’s Cross and a woven-wheat valentine.

This is a very brief overview of each activity and I cannot remember in full detail each instruction. 
PLEASE feel free to leave a comment if you have more information and I'll update this post. 
Thank you!

St. Brigid’s Cross
We tried St. Brigid’s Cross using chenille, then I tried it with stems from the grains.


We learned that the grains we had were not the same as the ones used in the design at the top of this post so our results were not the same.
The stems from our grain were more rounded and not flattened so the pattern used above was not possible for us.
We decided to braid our grains to see what type of result we would get.

This one was made by another participant and she incorporated red ribbon.

We ran out of time for me to make my grain weaving so I took it home.
Today I made a replica of the example above.
The heart is not woven, but braided instead.

Not the same as the original sample, but not a bad imitation!

I wish I'd known about this in the summertime ... I would have taken some of the grain from the field where my sister had her wedding photos taken and made one of  these for Mary & John!


See MORE from Get Connected Again here, and here, and here!

Get Connected Again - Widen Your Experience with Wide Games

Get Connected Again
(Held Sat.Nov.7 in Tillsonburg)

What a great day!!!

Session 2: Widen Your Experience with Wide Games
Wide Games are planned activities which give the girls practice in skills like tracking, coding, crafting, cooking etc. These games are usually outdoors and in the context of a story or series of linked activities. The term "wide" can be interpreted as wide in space, or wide as in requiring the participants to widen their experience. Wide games can take as little time as you want, or a whole weekend. All it takes is IMAGINATION.

This is a very brief overview of each activity and I cannot remember in full detail each instruction. 
PLEASE feel free to leave a comment if you have more information and I'll update this post. 
Thank you!

1. Night Eyes - Making a Craft

Set up Night Eyes - in your meeting place, at camp, or anywhere!
Next to each Night Eyes, post a clue or phrase.
Each clue/phrase will be paired with 1 or 2 items needed for the craft.
In our case, we received 2 beads with each clue/phrase, and 1 chenille = 5 Night Eyes.
Set up a main station where Guiders hand out craft supplies.
As the girls find each set of Night Eyes, they need to return with the clue/phrase and use it to receive 1 or 2 items needed for their craft.
Then they put together the craft.

There was more discussion of how Night Eyes can be used for a great variety of crafts, activities, etc. I do have the handout but it's downstairs and I'm upstairs and I want to get this posted, so I'll add them later!  :)

2. Countries
Split the girls into groups.
(oh yes, lots of great ideas of how to split the girls into groups! I'll try to remember to add a post about that too!)
Each group needs to decide on a country, a mode of transportation in that country, and a fact about that country.
Give each group paper and markers to draw their mode of transportation.
Give each group a card and markers to write the name of their country and the fact.
Now the fun begins!
Set up as pictured above.
Put the country/fact cards across the room from the picture (so they are in line).
Oh, no mode of transportation can be duplicated.  :(
Each group stands in their section to start.
They pick up their paper and, pretending to be that transportation, they go to the country card and read it.
Then they return back.
This is why you set up the country cards in line...you don't want the girls criss-crossing the floor.
Now they choose another transportation and pretend to be it, and go to the country and read the fact.
Repeat.
Repeat.
:)
Enjoy.

3. Guiding Facts Game

Set up the floor similar to above.
Roll dice.
One girl moves # of spaces.
Other girls ask her a question.
If she gets it right, she stays. If she is incorrect, she goes back to start.
We had 2 women play this so I'm not sure how many you could have in the game at a time. 
Girls can make it hard or easy depending on what questions they ask each other.
Great learning about Guiding for both those asking and answering the questions.


See MORE from Get Connected Again here, and here, and here!

Get Connected Again - Choices, Choices, Choices


Get Connected Again
(Held Sat.Nov.7 in Tillsonburg)

What a great day!!!

Session 1: Choices, Choices, Choices
Help the girls make the right choice.  
Leaders will leave with a lunchbox of ideas for the girls in their units!

This is a very brief overview of each activity and I cannot remember in full detail each instruction. 
PLEASE feel free to leave a comment if you have more information and I'll update this post. 
Thank you!

1. Paper Doll

Each girl decorates her paper doll to look like herself.
(the dolls represent self-esteem)
Then stand in a circle and pass the doll to your right.
Make a tear/cut in the doll you receive.  :(
Pass the doll to your right.
Make a tear/cut in the next doll you receive.  :(
Repeat until you get your own doll back.
Discuss with the girls how they feel about their dolls.

2. Apple

Pass the apple around and ask the girls to use one word to describe it.
One person holds the apple.
Using a bamboo skewer, ask each girl to come up and stab the apple, and then hand the skewer to the next girl.
Soon the apple will "cry" as the juices run out.
Discuss with the girls how the apple looks now and how (or if) it can be healed.

3. Toothpaste

One person sits in a chair (recommend it not be a girl as this could be emotional?)
Each girl comes up and says something mean to the person in the chair, and then squeezes toothpaste out of the tube.
Once all have taken a turn, tell them that the toothpaste tube represents self esteem. 
Discuss how the self esteem was reduced.
Ask them to come and try to put the toothpaste back in.
Discuss that as well.

4. Mirror

Provide a mirror to each girl.
Provide sharpies/markers and stickers to decorate.
Allow each girl to only write positive attributes about herself.
Each girl keeps her mirror to remind herself about her great traits!!

See MORE from Get Connected Again here, and here, and here!

September 14, 2015

Shop Local: Stone Paradise

Shop Local: Stone Paradise


We wanted to make an INUKSHUK for the garden.

Found all the perfect rock pieces at Stone Paradise!