Tutorial: Bag or Backpack
This is going to be a bit of a non-tutorial.
I found 2 great tutorials for making a backpack here at
and here at
So I thought, why reinvent the wheel?
So this isn't really a full tutorial.
But I did want to show you what I did differently!
In case it inspires you to design a backpack just for your own specific needs.
Mine, as it turns out, isn't a backpack!
I added purse-like straps instead.
It suits my needs.
So if you want a full tutorial, please visit either 4 P's in a Pod or The Ribbon Retreat.
Now, what did I do?
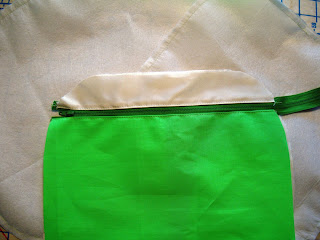
First I wanted the main zipper to be just like in the backpacks in the 2 tutorials.
So I did that.
Second, I wanted one large pocket on the back to hold my bug-net head covering.
So I made sure to add one.
Third, I wanted 2 pockets on the front where I could keep my sunglasses and gloves handy when I need them.
So I added them.
One of my other backpacks had this type of closure on an outside pocket, so I incorporated that into my design.
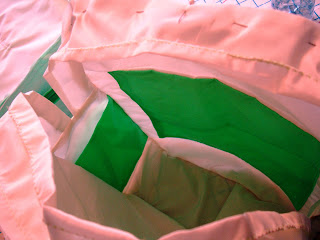
Fourth, just for fun, I added a large pocket inside.
And, because I wanted to challenge myself even more, I added a small pocket to the inside side wall.
I wrote myself a note to remember to add the straps because I hadn't yet decided if I was going to make the straps or use webbing.
And guess what?
I forgot.
So I had to take a bit of the stitching out here:
to add the straps. Oops.
I also added interfacing to the 2 main body pieces and to the green main zipper piece.
I meant to add it to the sides and bottom but I forgot.
Here are a few more construction photos:
I'd been mulling this idea around in my head for a few months.
I cut out the pieces one day and then sewed it all together the next day.
I really did take my time so as not to make any mistakes in sewing things in the wrong order and other than the straps, I did just fine.
Here is the pattern size I used:
I hope this inspires you to make your own bag!


This is great - and you make it look so easy! I'd love it if you shared it at the DIY party on the Pleasures of the NW.
ReplyDeletehttp://www.pleasuresofthenw.com/diy-party-no-5/
Thanks! I did! :)
ReplyDeleteThis is a super cute bag. Great idea. I would love to have you link up with us at Family Joy Blog Link Up Party this week. Check it out http://thinking-outside-the-pot.com/?p=2505
ReplyDeleteThank you! I will!
DeleteIt came out great! I wish I knew how to sew.
ReplyDeleteI learned as a girl and I'd like to think that if you get a sewing machine - even from a thrift shop - that there are probably lots of YouTube videos to help you get started. Or if you buy from a sewing shop they probably offer lessons. :) Try it! You'll like it! :)
DeleteWhat an awesome project, Anne! Thanks for sharing with #SocialButterflySunday! Hope to see you link up again this week :)
ReplyDeleteWow - you make it look so easy! Thanks for sharing on the Pleasures of the NW's DIY party!
ReplyDelete