Tutorial - Busy Book for Kaelyn
Wednesday evening my daughter texted me about Kaelyn.
She said Kaelyn could use some help with fine motor skills.
She and Kaelyn's mom were looking at busy books and similar toys.
I said "I can do that".
She requested pretty fabric.
I have that!
I knew I had this "paper doll" fabric and some coordinating prints.
And I knew I had pink!
And I knew I had other coordinating pretty fabrics.
So Thursday morning I started my sketching.
Then I gathered all my bits and bobs and doo-dads to see what I might use.
By Thursday afternoon I was laying out the design.
I spent Friday finishing up the design, cutting all the pieces and laying it all out.
Thank goodness for hubby - he removed the rings from the binder. ♥
That's when I realized I could add something to the spine!
So I added a piece to my sketching.
Now all fabric pieces were cut and ready to sew.
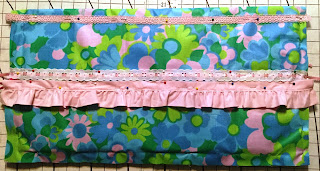
I even remembered to add some trims to the outside of the book!
Saturday was going to be sewing day.
I started about 10 a.m.
Just after 11 a.m. I was finished the sewing!
So then it was time to put the binder inside.
Suffice to say, there are good ways to do that, and not-so-good ways.
☺
The tutorial for that step will outline the way I would recommend now that I'm finished.
Final details were completed on Sunday when I made all the "clothes" for the little "paper doll" on the right side of the book.
All the "clothes" fit inside the zipper pouch and/or the clear snap pouch.
I'll do a separate post to detail some of the parts of this project.
The binder - preparing it and inserting it. (link to come shortly)
I enjoyed doing this and am glad my daughter - and Kaelyn - gave me the opportunity.
Here are the final photos.
The front cover.
The inside.
Inside left.
Inside right.
The activities we decided on were ...
On the right side of the book:
Velcro (doll and clothes), Snap (pouch), Zipper (pouch), and Buttons
The centre spine of the book has "Rapunzel" and her fabric braids.
The left side of the book has the Buckle, Shoelace Tying, Beads (counting, dexterity), and the LadyBug ("sew" ladybug button through the holes and put through buttonhole at the end)
No, I don't think I'll ever make another one.
☺
It was just something I enjoyed doing this one time.


This is absolutely wonderful!! Pinning on my gift ideas board! Thanks for sharing on the Pleasures of the NW's DIY link up!
ReplyDeleteThanks for the Pin! :)
DeleteThat is really cute...any little girl would absolutely love this! Thanks so much for sharing with us at Share The Wealth Sunday!
ReplyDelete